techniques: backward loop increase

Backward loop increase: what, why, and how
The backward loop increase is one of various methods to create stitches either mid-row, between existing stitches, or to cast on additional stitches at the end of a row.
One benefit to the backward loop is that it is a directional increase—that is, there is a right version and a left version. Why use a directional increase method? They are often used in shaping paired edges, such as at the sides of a garment's body, sleeves, or top-down armholes and necklines, as well as in other types of projects, like shawl edges. Any piece where shaping is occurring at both sides, directional increases give a mirrored, balanced result.
Unlike other types of directional increases (for example, the traditional make 1 increase) this method uses only the working yarn itself, rather than picking up and working into a strand from the previous row. Because of this, it can also be used at the end of a row to cast on more stitches. One drawback in using it mid-row, however, is that it can create a small gap in the fabric, below the increase, if worked too loosely.
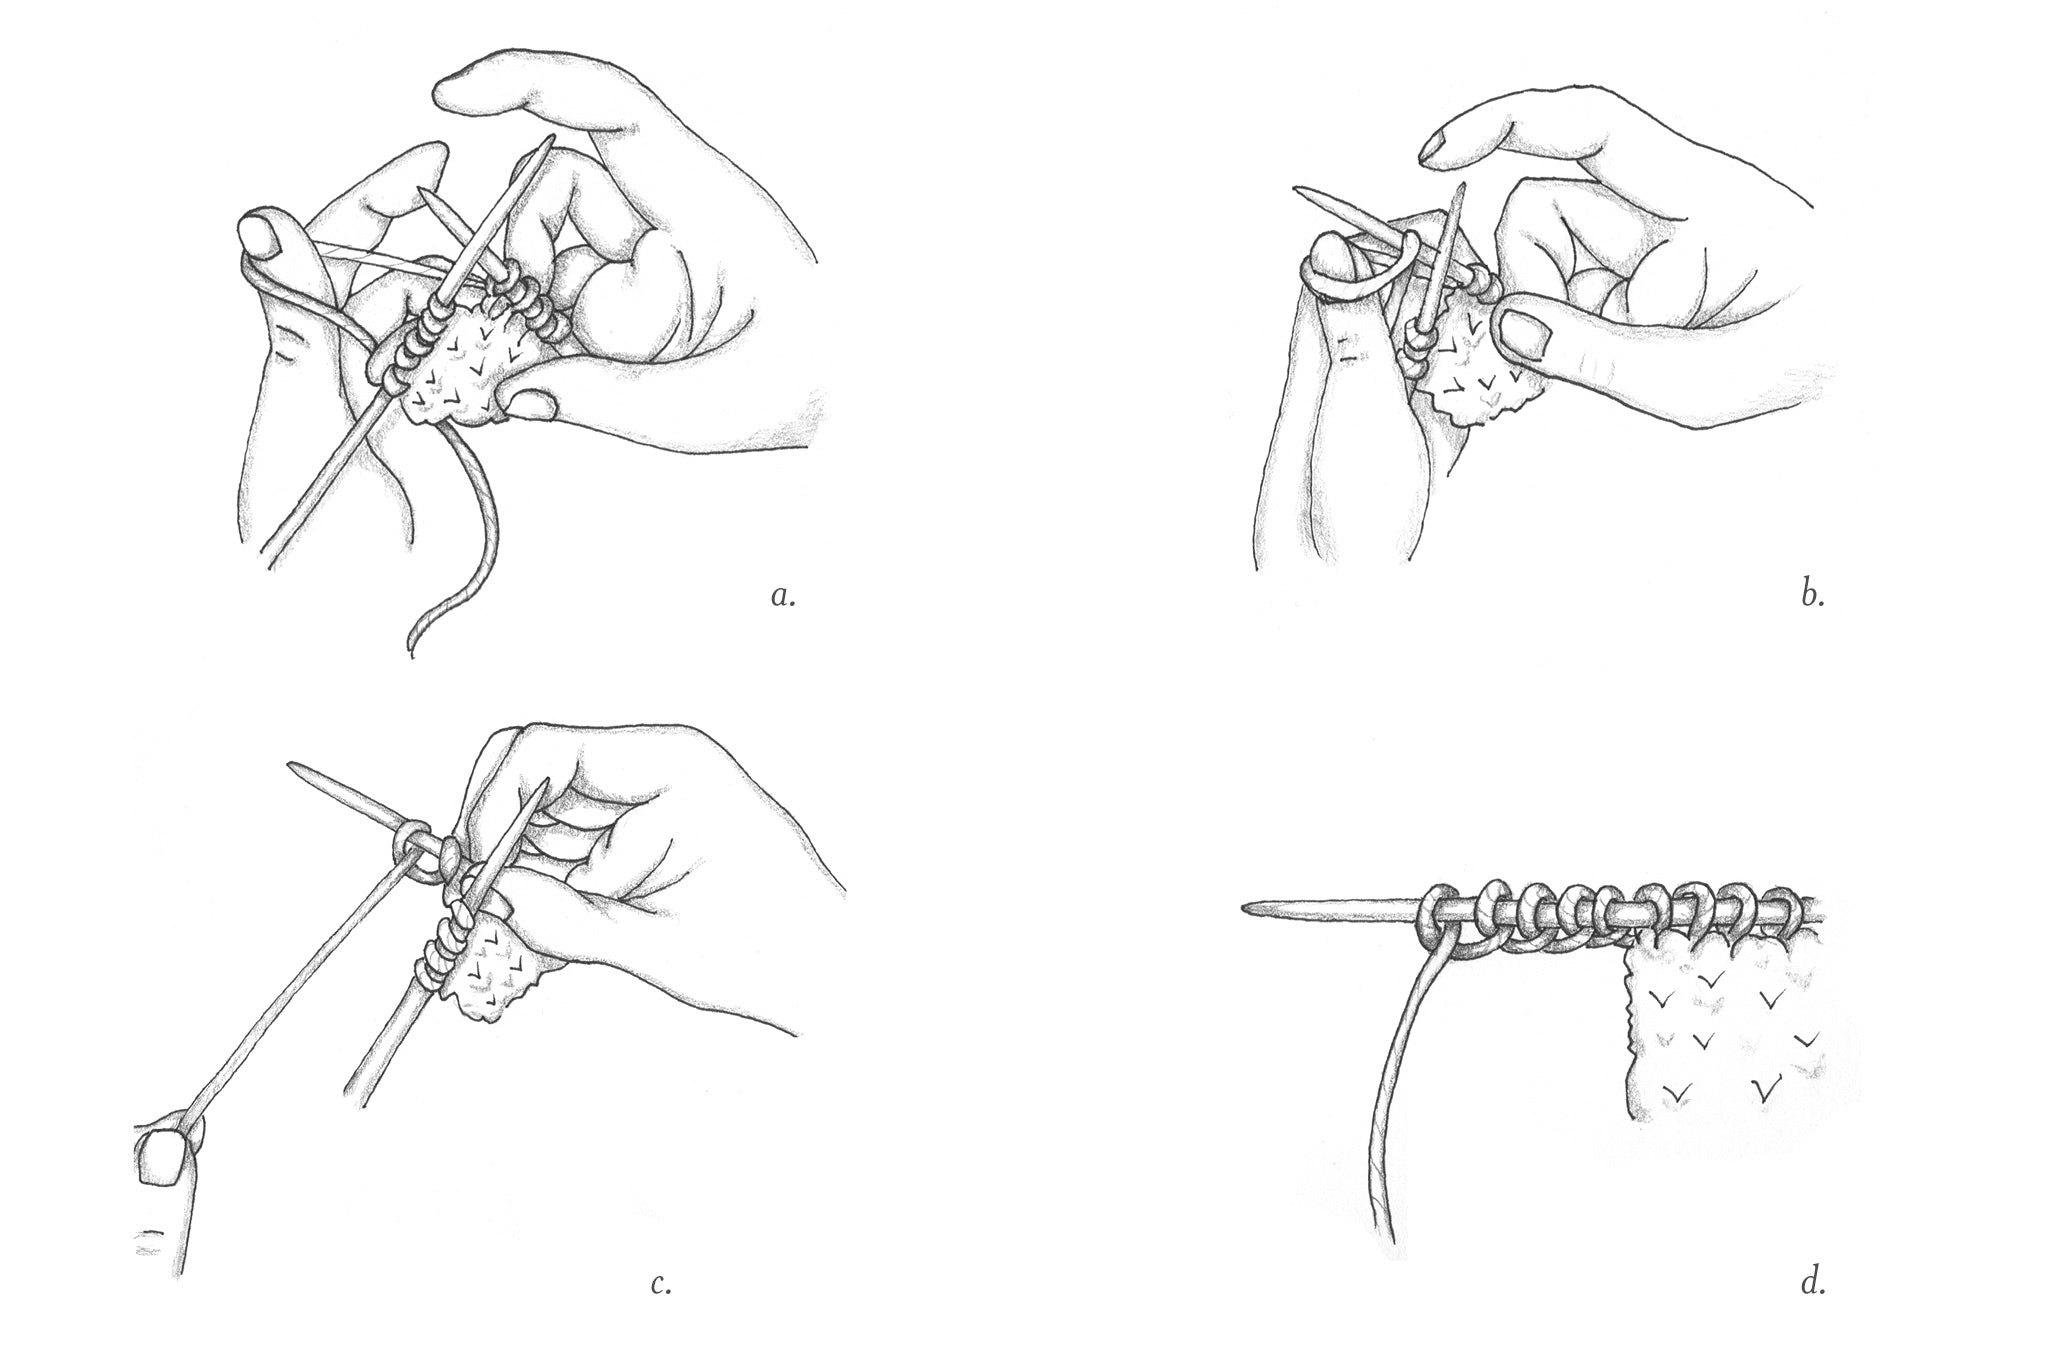
m1-L/loop: How to work the backward loop increase - LEFT (pictured above)
When working the backward loop increase-left (m1-L/loop) in the middle of a row:
a. At the point where you want to create a new stitch, take the working yarn in your left hand and wrap it around your thumb from back to front—the yarn tail will be at the front of your thumb, closest to you. Hold the tail against your palm with your other fingers to keep it in place.
b. Insert the tip of the right needle upward from below the yarn tail, and through the loop wrapped around your thumb.
c. Now, remove your left thumb and snug the stitch up by pulling the yarn tail with your left hand (letting go of the left needle temporarily—it'll stay where it needs to while you work).
d. To cast on stitches at the end of a row, work steps a through c until you have the number of additional stitches needed.
Helpful tip: Backward loop increase-left is worked with the yarn tail at the front, and after the increase is completed, the working yarn leads from the front of your work. Return the working yarn to the back if working a knit stitch after the increase.
To work its mirrored counterpart, the backward loop increase-right (m1-R/loop):

m1-R/loop How to work the backward loop increase - RIGHT (pictured above)
When working the backward loop increase-right (m1-R/loop) in the middle of a row:
a. At the point where you want to create a new stitch, take the working yarn in your left hand and wrap it around your thumb from front to back—the yarn tail will be behind your thumb, with the yarn attached to your work closest to you.
b. Insert the tip of the right needle upward from below the yarn tail, from back to front, and through the loop wrapped around your thumb.
c. Now, snug the stitch up by pulling the yarn tail with your left hand (letting go of the left needle temporarily—it'll stay where it needs to while you work).
d. Work steps a through c at the end of a row to cast on additional stitches.
Helpful tip: Backward loop increase right is worked with the yarn tail held at the back, and after completing the increase, the working yarn ends up behind your work.
Looking for other techniques covered here on the Quince blog? View all of our Techniques
1 comment
thanks for the simple way you explained the backward loop