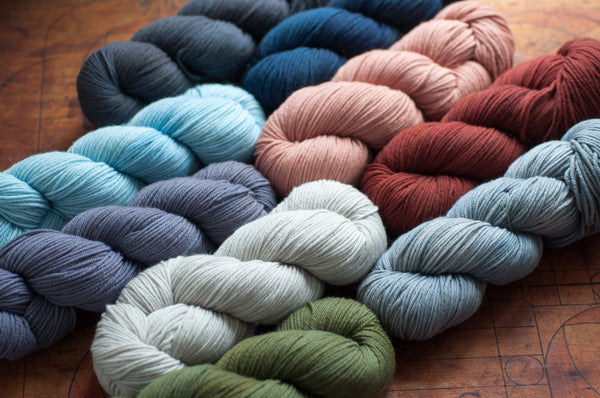
techniques: picking up stitches

picking up stitches: what, why, and how
Many a pattern instructs the knitter to, at one point, pick up stitches from a completed piece of knitting and continue on with the next part or piece of a project—for example, picking up stitches around an armhole to knit a sleeve down to the cuff, or picking up stitches around a neck edge or cardigan fronts to add trims. While it is possible to knit every piece separately and seem them together at the end, picking up stitches and continuing as a singular piece tends to be the more elegant solution.
As a general rule, when picking up stitches you will either pick up perpendicularly from the side edge of a knitted fabric (which is comprised of rows), or from a bind-off or cast-on edge (which is comprised of stitches, and from which your new knitting will flow in the same direction, stitch for stitch).
To do this cleanly and without unintentionally distorting the fabric, a little bit of reading your knitting is necessary—or at least, beneficial—so that the correct number of stitches are picked up and spaced out evenly across the edge you're working from.
Since individual knit stitches tend to be wider than they are tall (think about stockinette stitch gauges you've seen listed in knitting patterns: 18 sts and 24 rows to 4 inches/10 cm, to give one example), picking up from a side edge vs. a bound-off or cast-on edge each have their own methods, taking that stitch proportion into account.
Both are easy to do—we'll show you how.
how to pick up stitches from a side edge
For simplicity's sake, this tutorial uses the common rate of 2 stitches picked up every 3 rows in stockinette stitch, but read further on for picking up stitches at different rates.

Lay your knitting flat with the right side facing up, and the side edge facing away from you. Stretch out the column of stitches along the side edge of the fabric slightly (see above left, shaded pink).
Notice the running threads that connect the outermost side stitch to the one next to it (see above right, shaded pink)? The spaces between these running threads are used to pick up stitches. You'll pick up from right to left, in the same direction as you normally knit.

a. Beginning on the right-hand side of your side edge, insert your needle tip into the fabric from front to back, in the space between the side edge stitch and the running thread beside it. Go between the two stitches, taking care not to split the yarn.
b. Keeping a tail long enough to weave in later, wrap yarn around the needle and draw through the fabric, creating your first picked up stitch.
c. To pick up your second stitch, insert the needle tip into the space to the left your first stitch. Wrap yarn around the needle and draw through the fabric. There will be one running thread sitting between the two stitches.
d. To pick up your third stitch, locate the space next to the stitch just picked up. Skip this space, and insert needle into the space that follows it. Wrap yarn around the needle and draw through the fabric. There are two running threads sitting between this stitch and the previous one.
Pick up your fourth stitch beside your third without skipping a space.
And just keep working in this manner: picking up two stitches right beside each other, then skip a space. If you lose track of when you last skipped, the stitches on your needle will give you a clue:
e. When you skip a space, there will be a wider gap between the stitches. When you work at a rate of 2 stitches for 3 rows, you'll see sets of two stitches with gaps between.
f. When you reach the end of your side edge, make sure to pick up in the last two spaces, even if it would be time to skip. This example shows a group of 3 stitches at the very end, ensuring the last two spaces were picked up.
And there you have it!
Picking up into a side edge at other rates
If you need to pick up your stitches at a different rate—say 3 stitches for every 4 rows—pick up three stitches, then skip one space; repeat.
To pick up 1 stitch for every 2 rows, you will pick up one stitch in every other space along your side edge.
In all cases, make sure to pick up in the last two spaces of your edge, just as for the 2-every-3 rate above.
Lastly, only skip one space at a time. Skipping two spaces in a row will cause your side edge to gather and pucker, and your pick-up row will look uneven as a result.
how to pick up stitches from a cast-on or bound-off edge

Lay your knitting flat with the right side facing up and the cast-on or bound-off edge to be picked up facing away from you. The stitches along the final row of knitting will be visible as a row of Vs (shaded pink above, left).
Beginning at the right-hand side of your edge, insert your needle tip into the fabric, into the center of the first stitch (between the two legs of the V). Go between the legs of the stitch, taking care not to split the yarn.
Keeping a tail long enough to weave in later, wrap yarn around the needle and draw through the fabric, creating your first stitch.
To pick up the next stitch, insert your needle tip into the stitch to the left of the first stitch, again, making sure to go in between the two legs of the V. Wrap yarn around the needle and draw through the fabric.
Continue picking up a stitch in each cast-on or bound-off stitch until you've reached the end of the row. As you'll notice, you're picking up stitch for stitch and working in the same direction as the piece you're picking up from, so no skipping is necessary.
a worthwhile skill
Picking up stitches is a knitter's skill that you'll use again and again. We hope this tutorial shows you how easy it is to achieve a beautiful and clean-looking result, confidently and with ease.
Looking for other techniques covered here on the Quince blog? View all of our Techniques
6 comments
I agree with the earlier poster who prefers written over video explanations. This is very clear both in the writing and the illustrations. Sometimes I’m looking for a reminder or one detail in a technique. You’ve given a good overview with clarity on the fine points in a concise manner. Very nicely done, thank you!
This picking up stitches for a sleeve explanation was very helpful and confirmed what I was wondering about. (I also appreciated a quick read vs. looking at a video. Sometimes I prefer to read vs. watch a video.). I wondered if I should pick up the ladders in between the rows or just pick up a loop between the spaces which is much easier to do. I wonder if there is virtue in picking up the ladders way over the other way of picking up through the spaces which is easier.
Should I pick up drop-sleeve stitches from the right side and then begin knitting first pattern row on the wrong side? It seems this will create a problem by starting the decrease row on the wrong side 3 rows down??
This is my first time knitting fisherman’s rib (‘Hug Yourself’ pattern) Any help will be so appreciated!
These techniques are great! Thank you!!!!!!!!!!!!!!!
Hi there! When you’re knitting gloves, you will typically have to cast on a few new stitches at the base of the first finger to join the stitches from the front and back of the palm. When you start the next finger, you’ll need to pick up a couple of new stitches just above those you cast on for the previous finger; for that, you can use the method described in our post above for “how to pick up stitches from a cast-on or bound off edge.”
How when making gloves do you pick up two stitches from previous finger?