techniques: steeking

In this tutorial, we'll show you how to work a crocheted steek, step by step.
What is steeking?
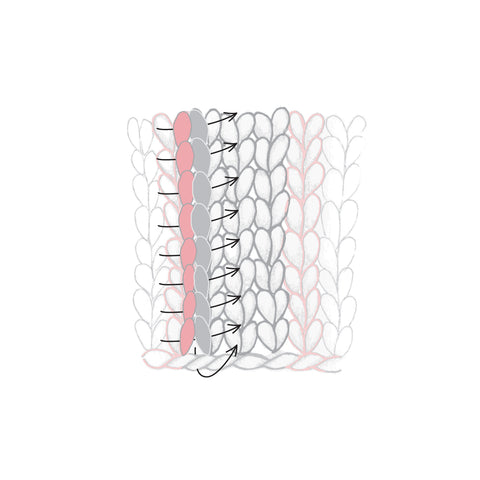
Steeking is a method of working a colorwork project in the round and cutting openings after knitting is completed—such as for cardigan fronts and armholes—to avoid working stranded knitting flat, back and forth. Extra stitches are cast on at these areas and are referred to as "steek stitches" which serve as the extra fabric used for reinforcing the edges on either side of the place where the opening will be cut.
Many knitters can't help but say "eeek!" at the idea of taking sharp scissors to their knitting, but with proper reinforcement, and the right kind of yarn (wool is vital, due to the fiber's tendency to grip together and stay fast, without unraveling—a smooth yarn like cotton or a superwash wool is not recommended) steeking allows you to knit uninterrupted colorwork rounds and create openings where needed. No fuss, just fun knitting and a beautiful, stress-free result (we promise).
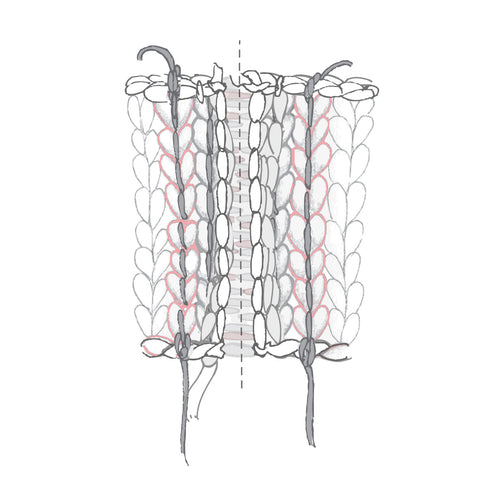
Before cutting the opening, the fabric on either side of the steek needs to be reinforced in some way to keep the stitches in place and well-behaved. There are a number of different methods of reinforcing the edges of your steek before cutting; in this example, we'll be using the crocheted method, which utilizes a crochet hook and spare yarn to create simple crochet chains going up each side of the steek opening.
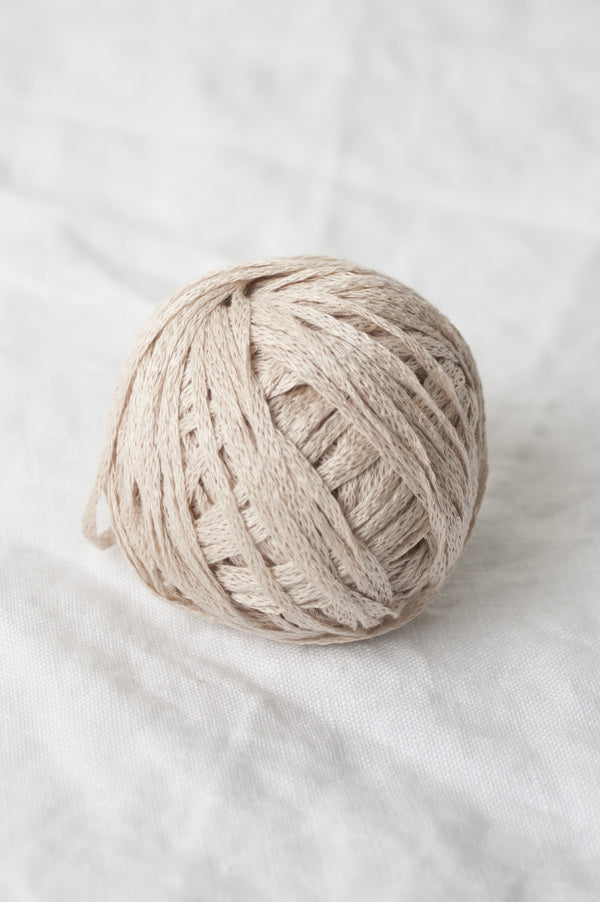
To work a crocheted steek, you'll need a crochet hook and spare yarn in a lighter weight, but similar color to the main color of your project.
How to work a crocheted steek
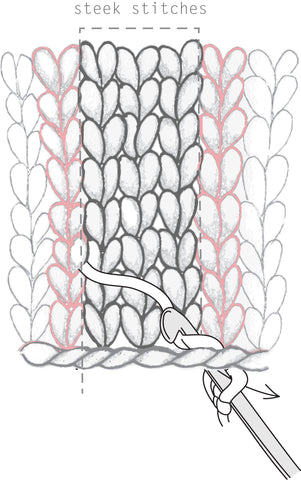
First, reinforce the fabric on each side of the steek, where the opening will be cut. Begin with the left side.
1. Make a slip knot and place onto crochet hook:

2. From the bottom up, insert hook into CO edge below the first stitch of the round (to the left of the last steek stitch):

3. Bring yarn over hook and draw through the slip knot:

4. From right to left, insert hook into left leg of last steek stitch and right leg of first stitch of the round:

5. Bring yarn over hook and draw through both legs and through the stitch on the hook:
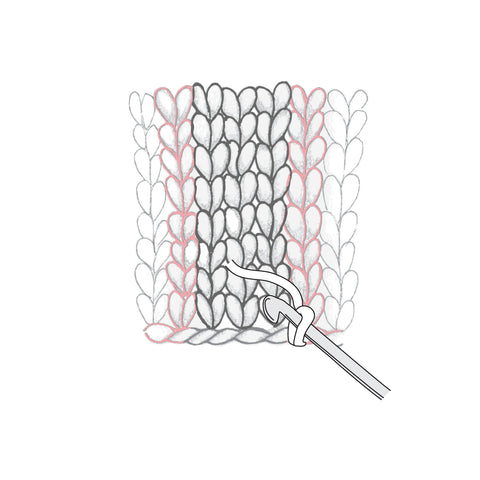
6. One row above, repeat the last two steps. Continue in this manner until you reach the BO edge:
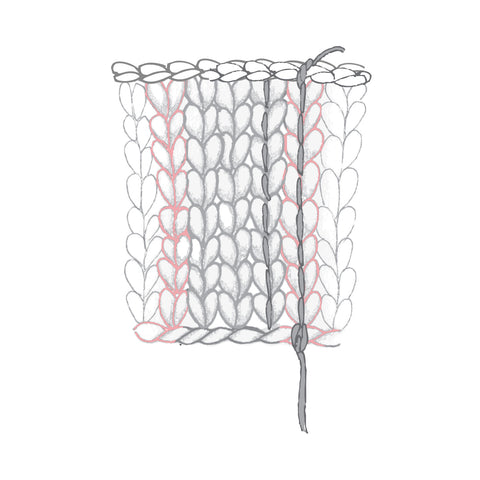
7. From front to back, insert hook into BO edge just above first stitch of the round. Bring yarn over hook and draw through the stitch on the hook. Bring yarn over hook and draw through the stitch on the hook one more time. Break yarn and draw through final stitch:

Now, do the same for the right side of the steek...
1. Make a slip knot and place onto crochet hook as for Left side:
2. From the bottom up, insert hook into CO edge below the last stitch of the round (to the right of the first steek stitch):
3. Bring yarn over hook and draw through the slip knot:
4. From right to left, insert hook into left leg of last stitch of the round and right leg of first steek stitch:

5. Bring yarn over hook and draw through both legs and through the stitch on the hook:

6. One row above, repeat the last two steps. Continue in this manner until you reach the BO edge:

7. From front to back, insert hook into BO edge just above last stitch of the round. Bring yarn over hook and draw through the stitch on the hook. Bring yarn over hook and draw through the stitch on the hook one more time. Break yarn and draw through final stitch:
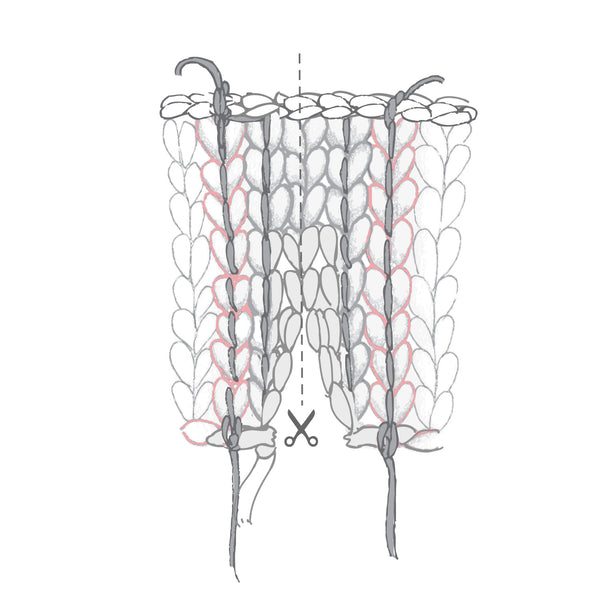
Cutting the steek
After reinforcing each side of the steek with crochet chains, you are ready to cut.
1. Locate the center of the middle steek stitch:

2. With sharp scissors, carefully cut through the CO edge just below the center of the middle steek stitch. Take care not to cut any stranded yarn from the other side of the fabric tube:

3. Once you are confident you are cutting only the center of the middle steek stitch, continue up the garment. Check occasionally that no stranded yarn or the other end of the fabric is in the way:

4. Work your way to the bound off edge, and cut through it. You have now successfully steeked:
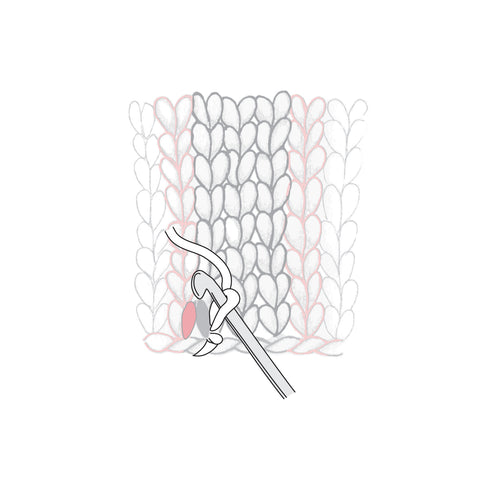
Picking up in a steek edge

After the cutting is complete, you can now pick up and knit into the reinforced edges of your newly cut fabric, to knit button bands and other trims if needed.
1. Locate the edge of the crochet chain, and fold along this edge so that crochet chain sits between two legs of a stitch; one leg on the steek side and one leg on the colorwork side of work:

2. To pick up, insert your needle into both these legs
together:

3. Skip whole stitches at the pickup rate described in your pattern:


Handling your cut steek
Some yarn ends will appear loose, and may come unraveled if fiddled with. If left alone, they will stabilize just as the end of a woven-in tail will. For extra stability, you can whip stitch the cut edge to the WS of the garment, or sew a backing fabric or ribbon to contain the edge.
Ready to steek? Cast on for the Watkins cardigan by Whitney Hayward, or the Norwegian-inspired Ebba pullover by Dianna Walla, and steek on.
Looking for other techniques covered here on the Quince blog? View all of our Techniques