techniques: crochet seaming
Crochet seaming: what, why, and how
Seaming can be a hot-button topic in the knitting world. Many knitters opt for a seamless pattern over one knitted in pieces, for the sake of avoiding sewing those pieces to each other neatly, easily, or without much cursing.
For seaming the side edges of pieces, or any edges with side-by-side matched rows, we recommend mattress stitch, which hardly seems like seaming at all. That said, there are times when mattress stitch won’t do the job. If the number of rows in your pieces don’t match up well or you need to ease a sleeve cap into an armhole, we love to suggest crochet seaming. It’s a great alternative to other methods for a number of reasons: It's more forgiving, it provides a more flexible, yet sturdy seam, and is less tedious than mattress stitch when working on many, many small stitches, as in our pretty Piper.
This technique is used in seaming and setting in sleeves in recent patterns: Estuary by Dawn Catanzaro and Bronwen by Véronik Avery.
Below is our step-by-step process for the crochet seaming method. We hope you find it useful!
How to seam using the crochet method
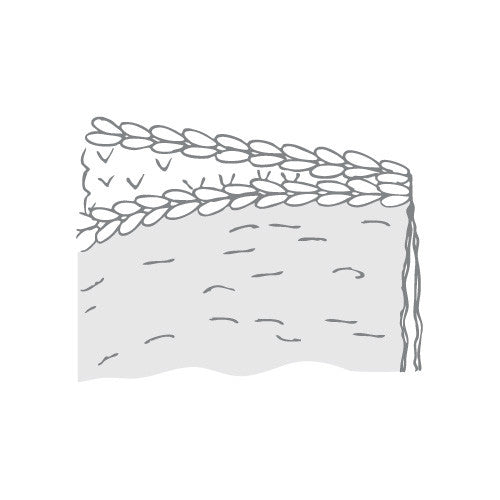
1. With right sides of pieces held together so that the wrong sides are facing out, line up the edges to be seamed. For a long edge or one where the pieces are different shapes (such as a sleeve cap and armhole opening), use knit clips, safety pins, or blunt seaming pins to hold fabrics together.
2. Using a length of yarn approximately double the length of the edge to be seamed, make a slip knot and place onto the crochet hook.

3. Beginning at the right-hand side of the edge to be seamed, insert hook from front to back through both pieces, taking care to be going under only one edge stitch for each piece.

Note: When setting in a sleeve cap, you will sometimes be seaming a side edge to a bound off edge. If you are working in stockinette stitch, this edge will look like a V, whether it's a side or bound-off edge. If working in another stitch pattern, the side edge may look different. Stretch the edge out slightly and use the running threads as a guide.
4. Bring the yarn over the hook.

5. Draw the yarnover through both layers of fabric and through the loop on the hook. Depending on your tension, the hook may slide easily though the stitch, or you may need to use your fingers to stretch the stitch slightly and bring it up and over the yarnover.

Repeat Steps 3-5, moving one stitch to the left. Continue in this manner until the the entire edge is seamed.

Note: When seaming a side edge, as for a body or sleeve, there should be approximately the same number of rows for each piece of fabric, so you will be working stitch for stitch, or row for row along the seam edge. When setting in a sleeve cap, or working along a curve, the rows or stitches may not add up perfectly. There may be times you will skip a row or two on one side to ease the curves together. Stabilizing your fabric (as explained in Step 1) will help you maintain a smooth seam edge, easing any extra fabric evenly along the seam edge.
Looking for other techniques covered here on the Quince blog? View all of our Techniques